Last month I painted up the Ophelia box, and even with a discount ended up in the hole. This being the final month of this round of Tale of Malifaux Bloggers, I figured I really ought to behave and stay on budget. Fortunately, the obvious expansion fits.
Annoyingly, I snapped off a leg when putting one model on the base. I was so mad I just slapped some CA on it, without even trying to get it to line up right. Maybe some day I’ll revisit it.
With the Haulers I have enough models to do a pure Gremlins 50 stone list, with Ophelia at the helm. I’ve gotten one game in and had a blast. I went a little overboard with Dumb Luck, and ended the game with only Ophelia alive, cowering in the corner. Fortunately, I scored schemes early (full points for Plant Explosives and Assassinate) and barely pulled out a win.
Last week I was able to get a game in with Alfonso, a local player that I’ve chatted with a few times, but had never played with. I decided to take my new ToMB Gremlins. Alfonso took Guild.
Deployment: Standard
Strategy: Reckoning
Schemes: A Line in the Sand, Vendetta, Bodyguard, Protect Territory, Frame for Murder
My crew:
Zoraida with Crystal Ball and Hex Bag
Francois LaCroix with Dirty Cheater and Hide in the Mud
Raphael LaCroix
Rami LaCroix with Dirty Cheater
Pere Ravage
Silurid (via Entrall)
Nurse (via Enthrall)
Alfonso’s crew:
Sonnia Criid with Cherufe’s Imprint, Reincarnation, and The Mask
Samael Hopkins with Witch Hunt
Guardian
3x Witchling Stalkers
Austringer
Death Marshall
We both declared Protect Territory. I took Frame for Murder on the Silurid, under the theory that he’d get killed in an attempt to deny Protect Territory, but I could Reckless-run somebody up to occupy the markers as needed.
Turn one, Zoraida summoned the Voodoo Doll, who hemmed Pere Ravage, then Interacted with the Doll to move Ravage forward. The Nurse jammed the Doll full up Uppers, so Ravage could shoot all the way across the board. Rami used Reckless to Focus, shoot and completely erase a Witchling Stalker, then take a swig from his Flask to heal back up. Raphael, the Silurid, and Francois moved up to get into more interesting positions. The Death Marshall tried to Pine Box Ravage, but failed. Sonnia, noticing how brutal Rami could be, put up her Flame Wall to block his LoS to most of her crew (and kept it up the whole game, tweaking the location by turn), then put some hurt on Ravage. Samael used his Burn Them Out to put Burning on Ravage. At the end of the turn, Ravage was down to one wound, with the Guardian and the Death Marshall in close range, plus Sonnia in range of Ooops.
Pere Ravage ready to blow
Turn two initiative was excting – could I get Ravage to suicide himself before Alfonso could neutralize him? He flipped a 12, and I flipped low. Despite the long odds, I decided to burn a stone, but still lost initiative. The Death Marshall activated and killed Ravage. This put wounds on the Guardian and the Death Marshall, but summoned another Witchling Stalker.
Otherwise, Francois ran up and killed the Death Marshall, before getting ganged up on and killed, giving Alfonso a Reckoning point. The Austringer got hemmed. The Silurid kept dropping markers along his flank. Rami took more potshots, and Raphael put the hurt on a Stalker.
Turn three, Zoraida stabbed the doll to kill the Austringer (including cheating the defensive flip down with the black joker). Rami and Raphael finished off the Guardian. The Silurid kept leaping around, dropping scheme markers. Sonnia took the bait, and killed the Silurid dead (giving me full Frame for Murder points), and clipped Raphael with extreme blasting as well. Zoraida stabbed the doll, killing both it and the Austringer. The Austringer’s Finish the Job meant that there were two scheme markers in base contact. Alfonso revealed Bodyguard on Samael, and kept him hiding behind a building and Sonnia’s Flame Wall.
It was getting late, so turn four would be our last. Raphael repositioned to be in Protect Territory range of the scheme markers, but got killed. A Witchling Stalker came out from behind a corner and sat right next to the two scheme markers. Sadly, it wasn’t quite in base contact, so Zoraida couldn’t Obey it to Interact them away. Instead, Z Obeyed it to walk away, and came out and dropped her own marker. The Nurse and Rami did the same. Samael came out of hiding and sat next to the two markers that the Witchling Stalker had abandoned.
The game ended, with a 7 to 6 win for Alfonso. We both got full points for our schemes, and Alfonso got one Reckoning point. Alfonso played a great game. He kept his models safe behind the Flame Wall, which forced me to either spend AP repositioning Rami or hit suboptimal targets, or both.
I had a blast with the Gremlins. Reckless and Dumb Luck are both a ton of fun. Dirty Cheater is a very handy little upgrade, and mostly erases the down sides of Reckless.
One key mistake was activating Pere Ravage early in turn one. If I had held him back until later in the turn, Alfonso would have had less of a chance to try to take him down. Hitting him with the Uppers and Hemming him (and using Dance Puppet) was probably overkill, too, without getting him to blow on turn one. Next time, I might try to hit him with the Nurse, Obey him forward with Z, then blow him on his own activation. Or just run him forward with Reckless late in the turn, then blow at the start of turn two.
I’m also still not quite sure what to do with Francois. He seems to want to be in melee, but died pretty quickly unsupported. Maybe I should keep him back as a shooter, and only move forward to respond, or protect the rest of the gunline.
I’m looking forward to more Gremlins, and having enough models to use Ophelia at 50 stones.
Last month I added Waldgeists, a Nurse, and a Performer to a Zoraida box. That nicely rounded out the crew with some staying power and Voodoo Doll tricks. Now it’s time to take it in a different direction.
I hemmed and hawed about what to do, but ultimately decided I had to use the Ophelia box I picked up at Adepticon. I was definitely painting it, and going Gremlin sounds like a blast. I can take them all (except Ophelia and the Young, obviously) with Zoraida, and every model I already have can come along if Z declares Gremlins.
The Kin (Ophelix box, purchased using $25 prize from Adepticon)
−$25.00
Remaining balance
−$5.00
What’s this? Another month of deficit spending? I considered doing another “sale” of the Ophelia and Young LaCroix models, but I felt dirty using both that and the super deal I got on the box. In the end, I’ll just admit to being a dirty spendthrift cheater.
Words aren’t enough penance, however, so I’ll be making a donation towards disaster relief through the Red Cross (sorry, WAAC, but I don’t think I can get a tax deduction or an employer match for a UK-based charity). To make it sting a little, for every dollar I’ve gone over, both this month and last, I’m donating ten.
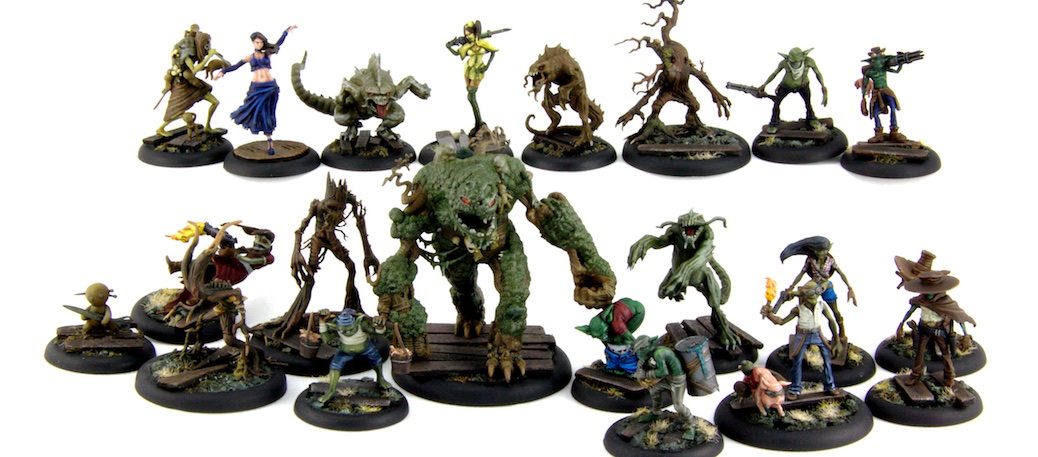
On to the models!
I decided fairly early on to use a variety of different flesh tones. After all, I do the same for my human models. I also wanted to use a variety of colors for clothes and such, to emphasize their ragtag nature. I kept consistent colors for woods and leathers, however, to try to tie it together a bit.
Ophelia
Ophelia gets olive drab. I decided to freehand a pattern on her shirt. It gets the job done, but I’m not in love with it.
Francois
Francois gets cool blues. His face is pretty much invisible until you get to a really low angle. I used the colors I’ve been using for woods on his hat, pants, and poncho, which gives it a nice dark, warm brown.
Pere Ravage
Pere is another olive drab. This guy cracks me up. He just looks so happy. I lost a piece of the pig’s straps to the floor gods, so just put some dynamite in it’s place. I also tried a bit of OSL-style edge highlighting, which I think gives it an interesting look.
Rami
Rami is warm greens. His gun was surprisingly hard to assemble, but looks okay now that it’s painted.
Raphael
Raphael is non-drab olives. I’m particularly happy with how his skin came out, although he isn’t quite standing straight on his base.
Young LaCroix (shooting)
The young all have colors which tie them into Ophelia’s model. This one gets a dress that matches Ophelia’s shirt. The skin is undead flesh tones, and I did the same kind of OSL edge highlighting for the muzzle flash. I’m not sure of the colors, but otherwise I like the effect.
Young LaCroix (shooting)
This one’s pants and shirt both match Ophelia. I couldn’t resist adding some detail to the underwear.
Young LaCroix (shoulders)
This pair has olive and olive drab skin, and clothes that match Ophelia.
Next month, I hope to keep it under budget and add in some Slop Haulers. I also hope to actually get some games in.
I’ve gotten a couple of games in with my second month of Zoraida. The full crew list now consists of:
Zoraida
Voodoo Doll
Bad Juju
3 Silurids
3 Waldgeists (new for month two)
Nurse (new for month two)
Performer (new for month two)
Last month, I found that I didn’t have enough Swampfiends for Eternal Fiend to let Bad Juju pop out when needed. The Waldgeists have definitely helped with that, plus give a great 9.6″ engagement bubble (40mm base plus 4″ on either side) to give trouble to the opponent for some schemes and strategies.
The Nurse and Performer were brought in for Voodoo Doll Poison tricks. The basic tactic looks like this
Zoraida summons a Voodoo Doll, who Hems a tempting target. The Doll should get dropped in engagement with the Nurse, if possible. From this point, any damage or conditions given to the Voodoo Doll go on the target as well
Zoraida still has one AP left. If the Hem doesn’t go off, Zoraida can Obey the Doll to try again. If not, she can potentially Obey the Nurse to hit the Doll instead. Or maybe Obey to move the Doll into a better position. There’s another great movement option available – Zoraida can Interact with the Doll to move the Hemmed model. If nothing else, her Voodoo Pins can hit the Doll with Poison +2.
The opponent gets to activate something. Hopefully they can’t remove the Hem condition.
The Nurse activates. She hits the Doll twice with her Syringe. The Doll relents, and probably takes 0 damage and Poison +8 (+12 if Zoraida Obeyed the Nurse)
The Performer chain activates off the Nurse’s Accomplice. She Siren Calls on the Hem target (requires 12″ range and LOS), with the real goal being the built in Sip of Wine, which does damage equal to the Poison condition, with no upper limit. If that doesn’t finish off the target, you can do the same to the Doll for another 6 damage.
When this goes off, it’s awesome. Only two of the actions (Hem and Siren Call) can be opposed, and neither needs suits. The Chain Activation makes it fast. Once an opponent knows it’s coming, though, it’s harder to pull off.
What I haven’t been so successful at is coping with failures, especially if I lose one of the models. Shenlong or other condition maipulators make it hard to use as well. The Performer has great scheme marker tricks, which I need to get better at using. With Don’t Mind Me, she can Interact when engaged. She can also blow up both friendly and enemy markers at range.
The Nurse has a lot of other manipulation options, but they’re tricky enough that I have a hard time coming up with uses for them on the fly. I should work out another couple of options.
I’m really not sure what I want to do about month three. I have $20 to play with, since I borrowed $2.50 from month two. I’m considering either Killjoy or doing something with Gremlins.
Killjoy’s MSRP is $18, so neatly fits into the budget. It also would give an extra bit of face beating, either to supplement or replace Bad Juju.
I’m already working on some Gremlins, which would be convienent. I haven’t figured out if there’s a useful chunk of models that fits into the budget, however. Maybe I could ‘sell’ Ophelia and the Young, then split the rest of the Kin into months three and four.