I decided I wanted to take my Deathwatch to the Adepticon combat patrol event, which meant I needed a little bit of reinforcements. I had wanted to do the dreadnought from the strike force box for the Inquisition War, but didn’t have a chance before the campaign ended. Here was my excuse!
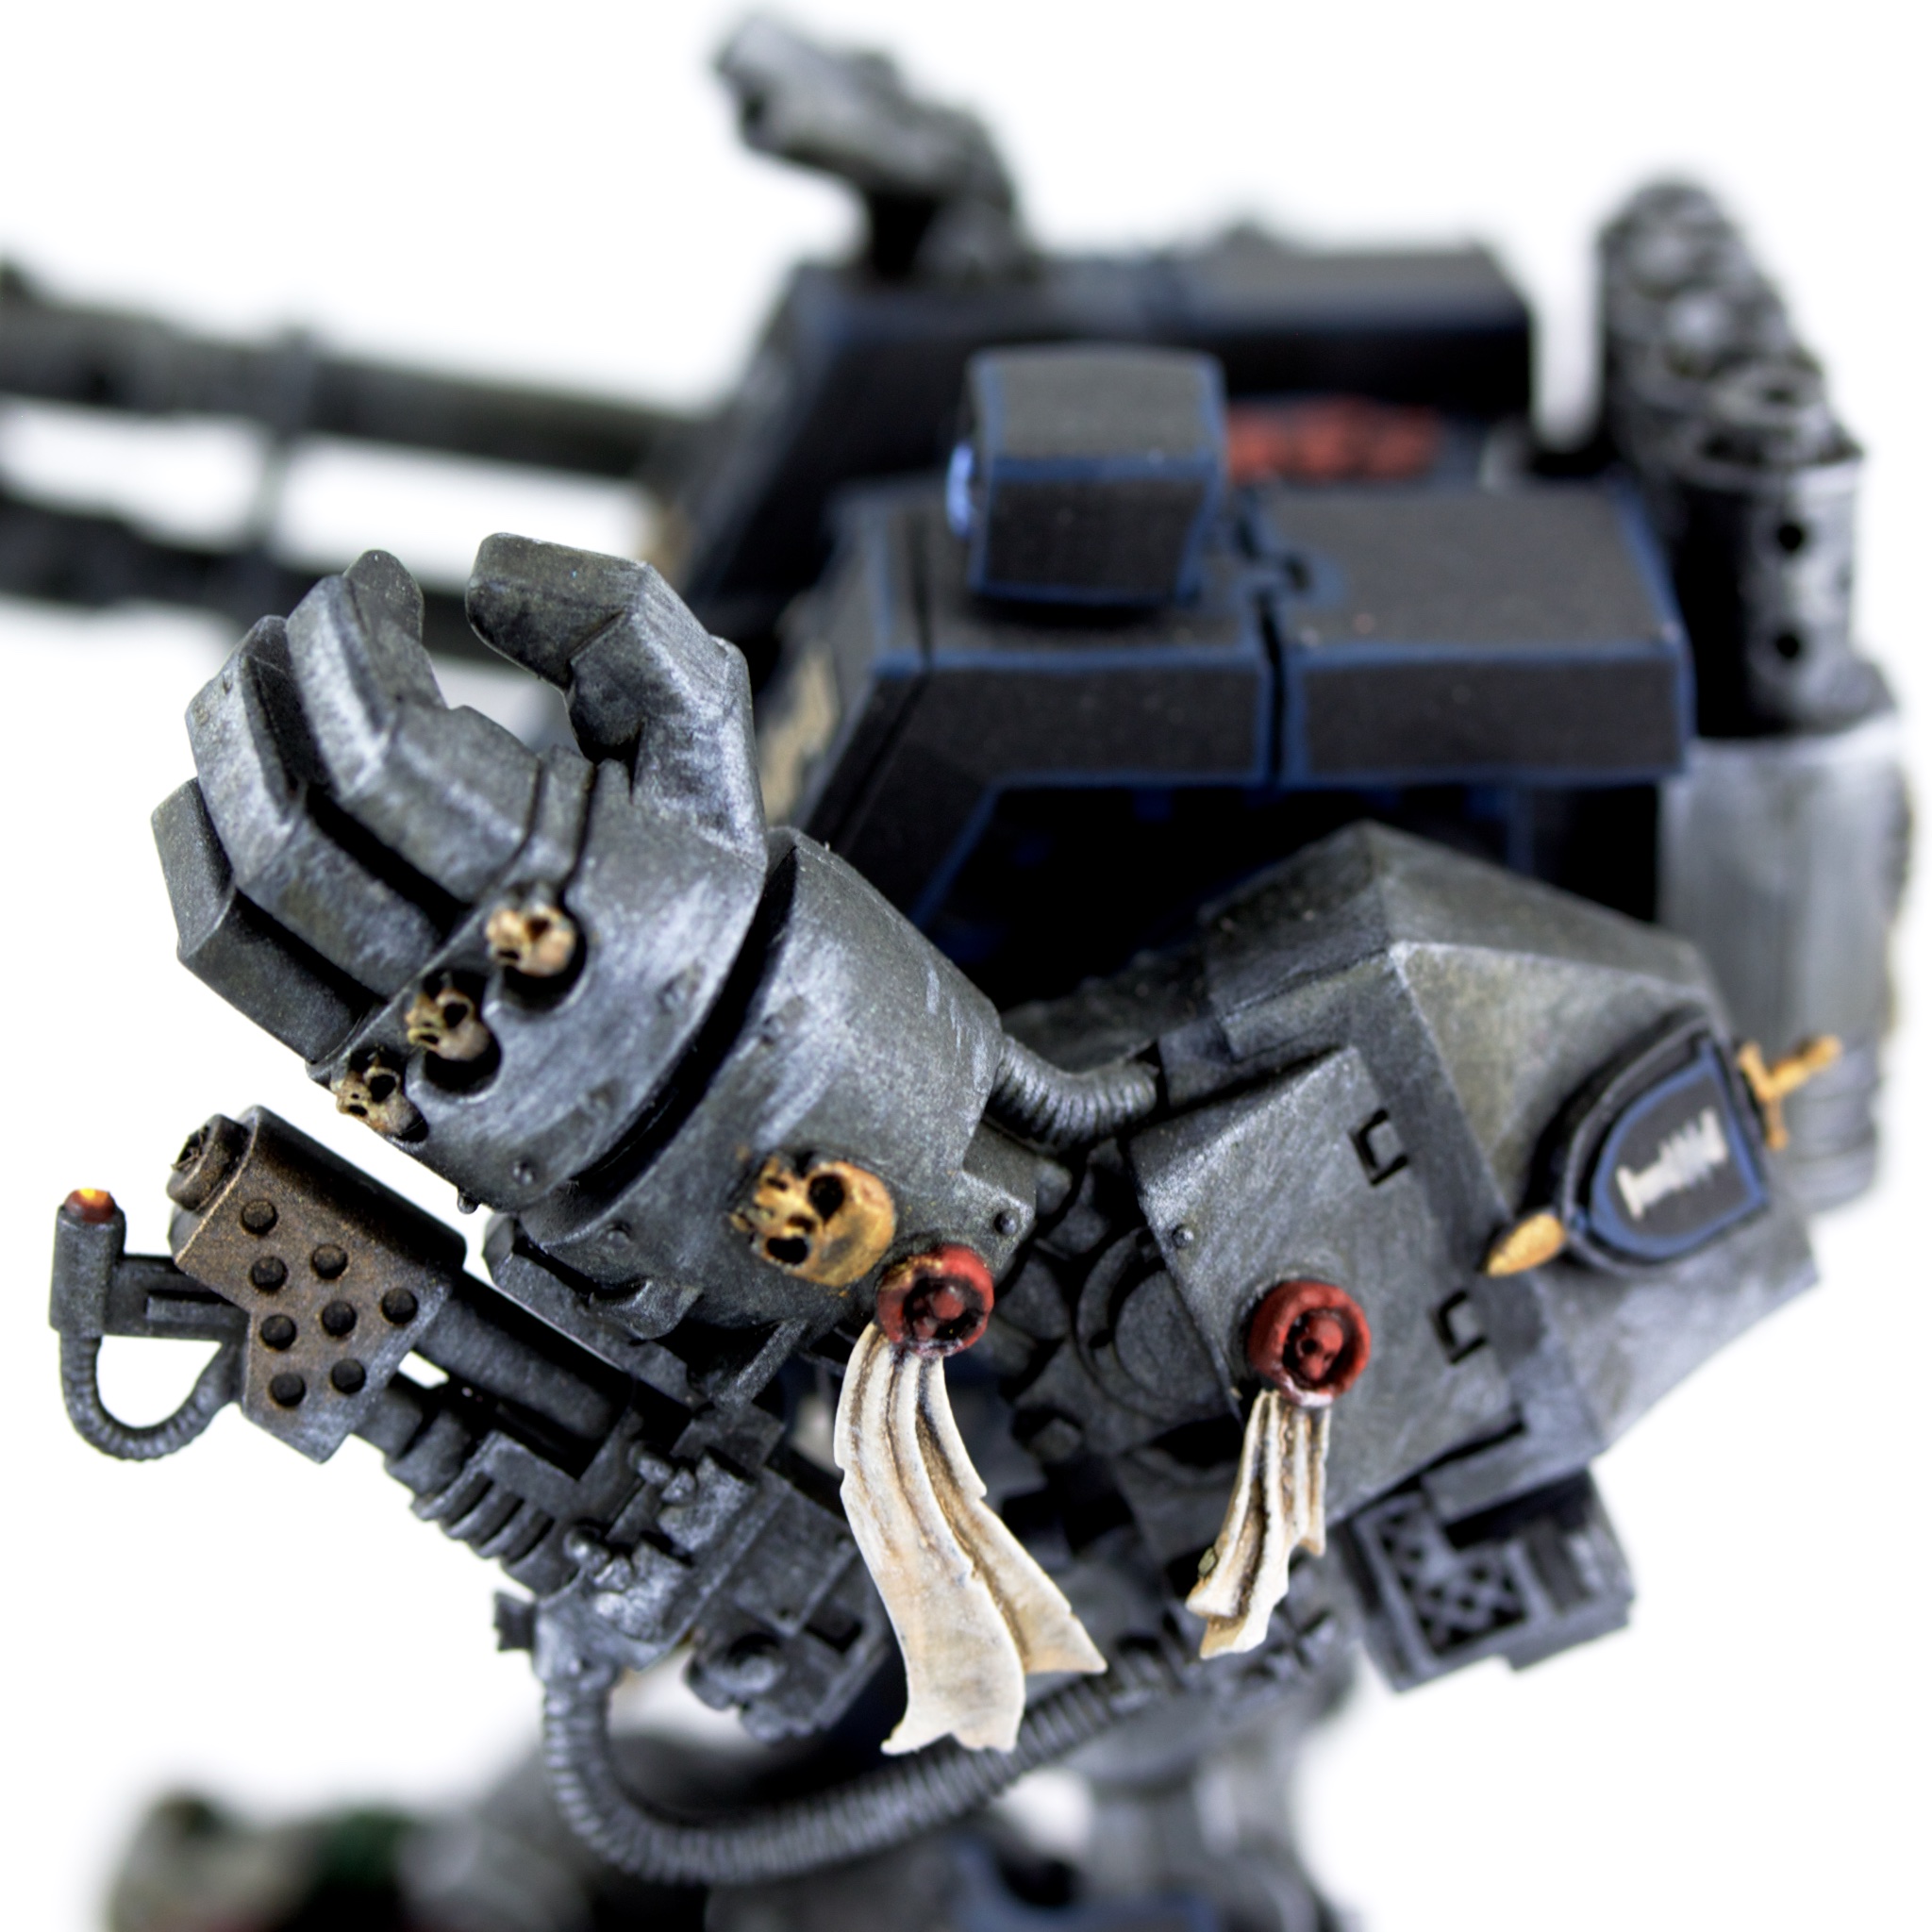
Deathwatch Dreadnought
The dreadnought model has always struck me as a little static, so I wanted to try to fix it. I figured tweaking the legs ought to do it. I also repositioned the toes to try to make it even more dynamic, but it didn’t really come through.
Deathwatch Dreadnought (arm detail)
Hopefully the parchment on the arm conveys a sense of motion. I had considered putting another ork getting punched out, but decided that one would be enough.
As I’ve been doing for the rest of the Deathwatch, this guy gets all the bling, from every angle.
Amathor Arch Mage is one of the many Reaper models I bought ages ago in my high school D&D days. I painted him up a while ago now, as a change from endless piles of Ultramarines.
I think he may be my very favorite of the Reaper models I’ve painted. The beard has just enough texture to be interesting. I ended up entering him into the painting competition for Celesticon 2013.
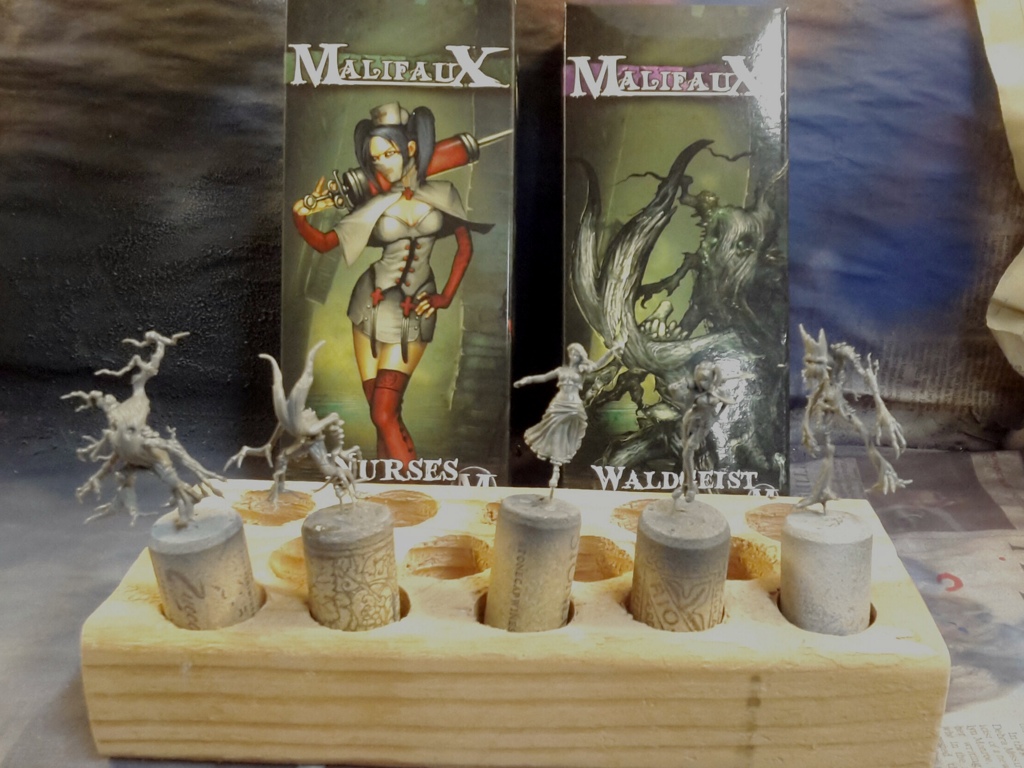
I’m playing Malifaux at Adepticon, so I’m eager to get started on models for month two. From my first game with Zoraida, I saw a few gaps:
Not enough Swampfiends
Not enough Voodoo Doll tricks
Not enough skill (sadly, can’t just buy that..)
Month Two Commitments Ready to Prime
For Swampfiends, Waldgeists are the obvious answer. They’ll help give more Bad Juju entry points, and can hold a ton of ground with a 4″ engagement range.
For the Voodoo Doll, I think a Nurse would make a nice addition. She can be hired thanks to Zoraida’s Enthrall ability, and can hand out a ton of conditions through the Voodoo Doll. Her base attack hands out +4 Poison. Plus, Take Your Meds is a toolbox: it can give Paralyze while healing the Doll, or restrict actions enough to practically be Paralyzed.
Finally, I want to add a Performer into the mix. She’s can Interact while engaged through Don’t Mind Me, and can discard enemy scheme markers at range with Seduction. Finally, her Sip of Wine trigger on Siren Call can combo the Nurse’s and Zoraida’s Poison on the Hem target to do a bunch of damage at once.
As for accounting, I’m going to steal an idea from Rathnard and pretend I’m selling extra models for 2/3 the purchase price. I’m actually using the limited edition Performer from Wyrd’s Black Friday sale, but I’ll use the pricing for the metal one. It puts me $2.50 in the hole for month two. Maybe I’m just trying to justify it, but I’m going to do these models ahead of Adepticon one way or another. I might as well get credit for it.
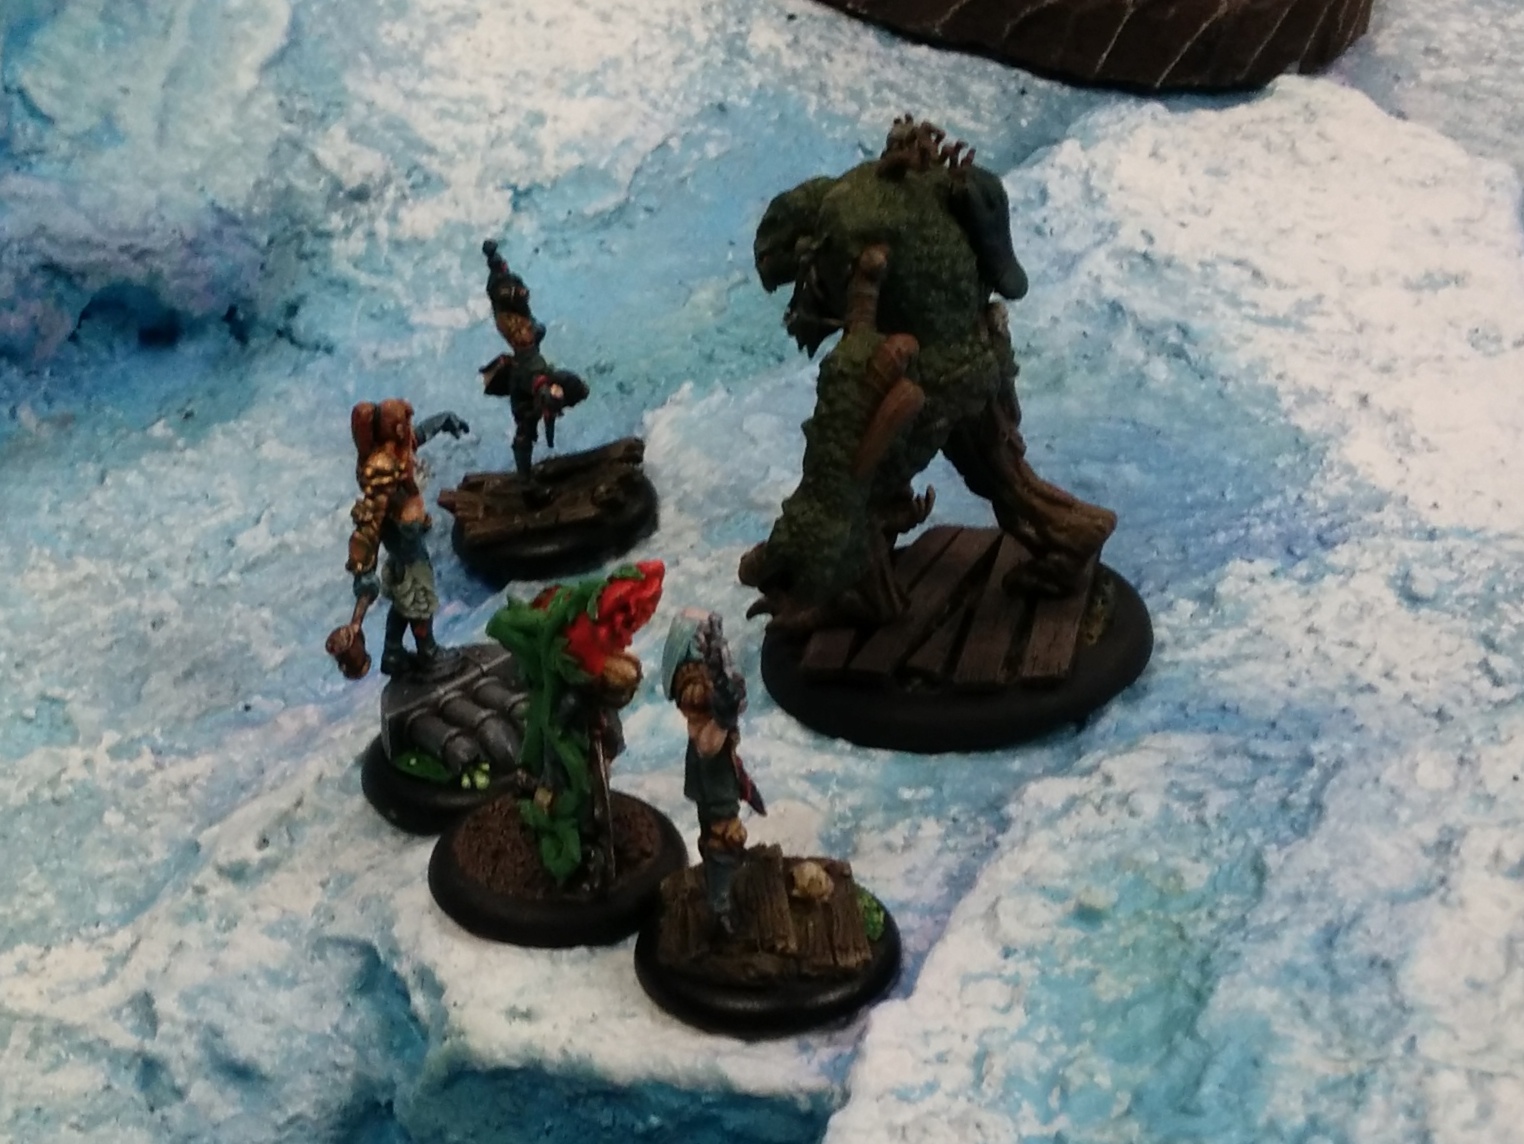
I got in my first game with Zoraida last week at the FLGS. This was also my first game against my opponent, who goes by Yoritomo Jiriki on various forums. I had to cheat the ToMB rules a bit, since it was nominally a league game at 50ss.
Close deployment
Reckoning
A Line in the Sand, Outflank, Bodyguard, Breakthrough, and Make Them Suffer
My crew:
Zoraida with Crystal Ball and Hex Bag
Bad Juju with Eternal Fiend and Fears Given Form
3x Silurids
Terror Tot
Depleted
Doppelganger
The Terror Tot, Depleted, and Doppelganger are all outside of the ToMB format, but I needed to get to 50ss somehow.
His crew (roughly):
Von Schill with Shirt Comes Off
Steamtrunk
Taelor
Lazerus
Librarian
Hodgepodge Effigy
Sue
I took Bodyguard and declared Breakthrough. My opponent did not declare any schemes.
Deployment
My thinking was to use the Silurids and Tots for Breakthrough scheme markers, and Eternal Fiend on Bad Juju ought to make Bodyguard reasonable. Hopefully, the Depleted would help to tarpit somebody, while being a bit difficult to take down for Make Them Suffer or Reckoning. I failed to consider what I would do with the Doppelganger.
Bad Juju about to get smacked
First turn, two of my Silurids and a Tot ran up the flanks to put down Breakthrough markers. Zoraida summoned a Voodoo Doll who Hemed the Steamtrunk, and loaded it up with Poison. Most of the rest kind of bunched up in the middle, and my other Silurid got murdered.
Bad Juju ended up charging into a furball in the middle of the board. He did some damage, but as much as I wanted.
Turn two, things started really going badly for me. My opponent first killed a Silurid, revealing Make Them Suffer, then took down Bad Juju. That left only a final Silurid and Zoraida as possible targets to bring Bad Juju back. I over-focussed on the Hemmed Steamtrunk, and took it down. On the plus side, I got a lot of Breakthrough markers down.
Turn three, I brought my final Silurid into combat. I wanted it to die, just to get Bad Juju back out. My opponent obliged, but managed to Paralyze Bad Juju with Von Schill’s shirt before he could activate. Zoraida summoned another Voodoo Doll, but failed to Hem anything.
Through turns four and five, my opponent just took my crew apart piece by piece. In the end, all I had was Zoraida. At least he was unable to remove enough scheme markers to deny me Breakthrough.
The game ended with a solid loss, 3 to 5+. There was some uncertainty as to how many Make Them Suffer points my opponent had achieved, but he definitely had a good win.
I made a number of serious mistakes in this game:
I took a Doppelganger without any real plan for her. That’s 7 stones that weren’t put to use.
I had too many scheme runners for my schemes
I didn’t have enough Swampfiends to keep Bad Juju going
I got excited about the Voodoo Doll, but didn’t consider carefully enough what to use it on. Furthermore, when I was in a bad position, I stuck with it and essentially wasted my AP rather than moving to a new one.
In this strategy and scheme pool, I really should have taken another heavy hitter, and fewer little guys.
Hopefully I can keep these lessons in mind next time!